3D Printed Enclosures: A Custom Box That Fits Your Board
This page is about printing a custom box for your electronics, controls, or equipment, not an enclosure for a 3D printer. One part or ten thousand, from one file. We add ports, bosses, and threaded inserts to fit your board.
Made in the USAMost orders ship in 3 to 5 business daysPrice online in seconds
What is a 3D printed enclosure?
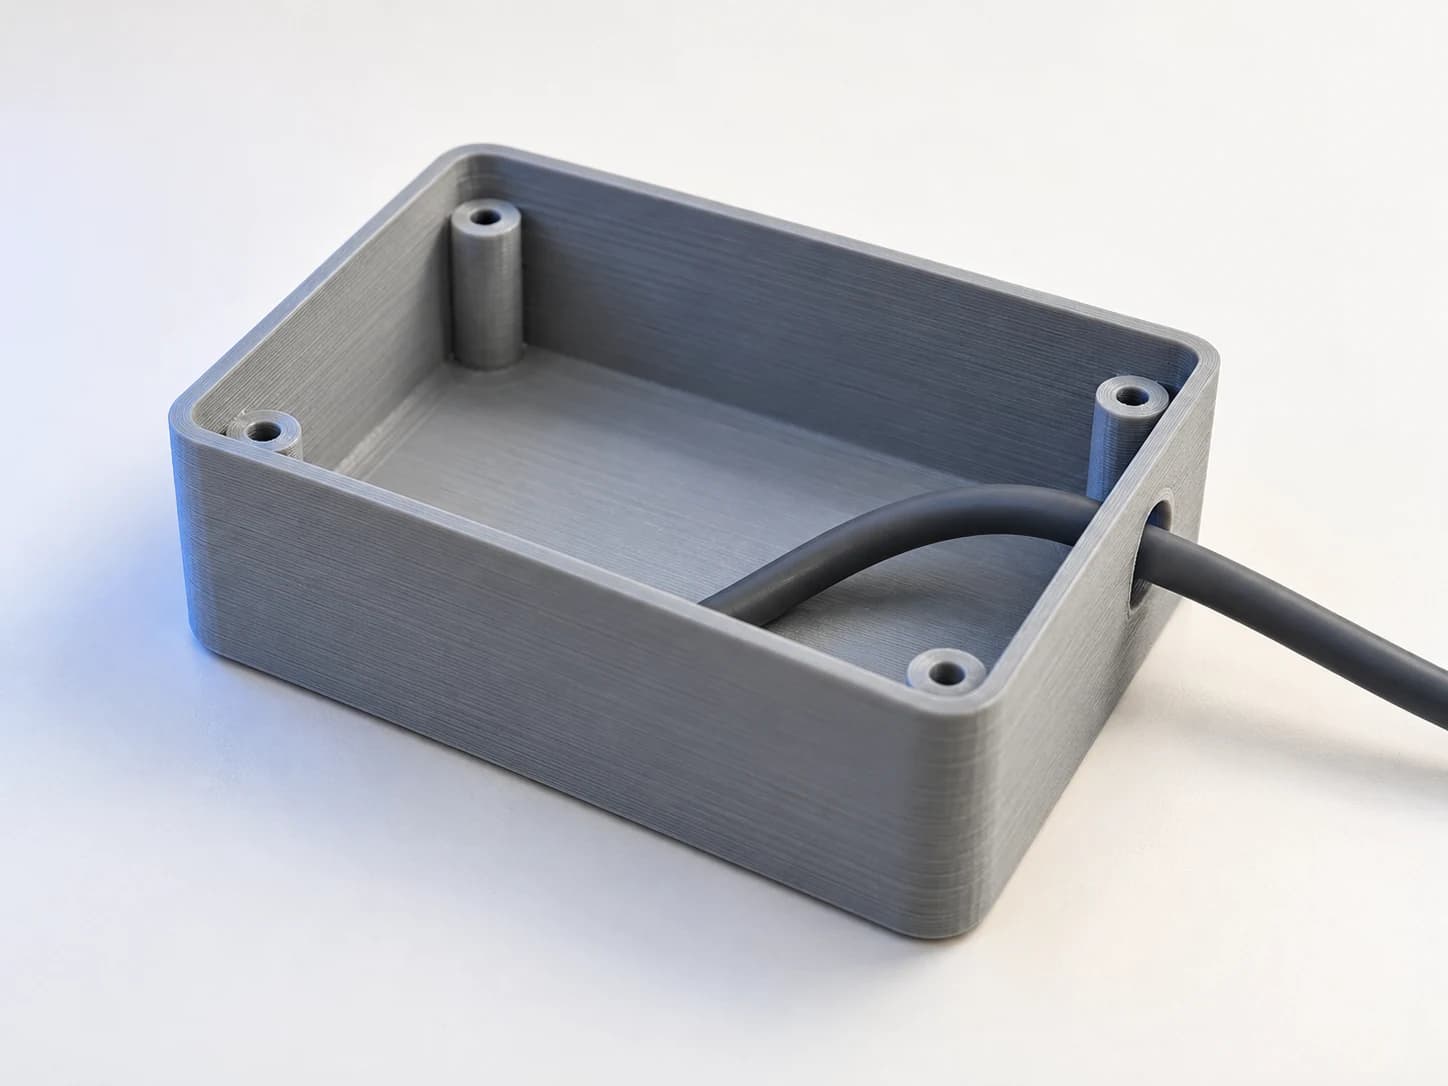
A 3D printed enclosure is a plastic box built up layer by layer. It guards a circuit board, a sensor, or a small machine part. You draw the box you need. We print it. There is no mold to pay for and no minimum order.
Here is what this page is about. We print boxes that guard your own electronics, controls, or equipment. We do not sell enclosures or cases for a 3D printer. Looking for a printer enclosure kit, an IKEA-style cabinet, or a DIY printer box for your own machine? This is not that page.
Buyers pick a printed box when a stock box will not fit. Maybe the board is an odd shape. Maybe you need a slot in one wall and a vent in the next. A printed box carries those features from the start. You do not drill or file anything.
The same file works at any count. Print one to check the fit. Print 500 when the design is locked. The shape does not shift between the two. For a quick overview of the part type, see our guide to 3D printed enclosures.
How thick should enclosure walls be?
Start at 2 mm. That is the wall thickness most printed boxes need. Two millimeters gives you a stiff shell that takes a knock. Go to 3 mm on a big box, or on a lid people open every day.
Our upload check flags any wall under about 1.6 mm. Thin walls crack at the corners. They also flex when you tighten a screw. Half a millimeter more plastic costs pennies and buys real strength.
Round the inside corners. A sharp inside corner is where a box splits first. A small fillet spreads the load. Add a rib across a long flat wall if the wall feels springy. All seven checks are listed on our design checks page.
How do you put screws in a printed enclosure?
Two ways work. You can cut threads into the plastic. You can also press a brass heat-set insert into the wall. Brass wins when the lid comes off more than a few times. Plastic threads wear out. Brass does not.
A screw boss is the post the screw goes into. Keep the wall of a boss at 2 mm or thicker. Tie the boss to a side wall with a small rib so it cannot snap off. Most M3 heat-set inserts want a hole near 4.0 mm. Tell us the insert you buy and we size the hole to it.
Self-tapping screws are fine for a box you open once or twice. Leave the hole a touch smaller than the screw. The screw then cuts its own thread on the way in. Ask us and we set that hole size for your screw.
How do you get a lid to fit right?
Leave a gap. A printed lid needs about 0.2 mm to 0.3 mm of clearance on each side. Draw the lid at the same size as the box and it will bind. Hot plastic shrinks a little as it cools.
FDM holds about plus or minus 0.5 percent, with a floor near plus or minus 0.5 mm. That is typical, not a promise. So a snap fit or a press fit needs one test part first. Order one, check the fit, then order the run. The tolerance entry in our glossary spells this out.
A lip beats a flat seam. Print a small step around the rim so the lid drops in and lines up on its own. Screws then pull it tight. A soft TPU gasket can sit in that step when you want to keep dust out.
Cable holes, vents, and panel cutouts
Every cable hole needs a clean edge. A sharp edge cuts the wire jacket over time. Round the lip so the cable cannot chafe. Add a small notch beside the hole for a zip tie and the cable stays put.
Print vents as rows of short slots, not as one wide opening. A short span bridges clean. A long one sags in the middle. Keep any single open span near 10 mm or less and the vent comes out crisp. Our guide to printing without supports covers the same idea for other shapes.
Cutouts for a switch or a jack print best on a wall that stands upright. Hole size drifts a little, so a tight jack may need a test print. Flag the one cutout that must be exact. We hold that one closest.
Face the rough side down. The bottom of a box comes out smoother than a steep overhang. We pick the print angle for you. Just tell us which face people will see.
Which plastic should you pick for your enclosure?
Match the plastic to where the box lives. PETG is the default for most jobs. It is tough, it takes water and shop chemicals, and it holds its shape well in normal heat. PLA costs less but has the lowest heat tolerance of our five core materials, so keep it indoors and out of the sun.
ABS is the heat pick, second only to PA-CF. Wide flat ABS walls can lift at the corners, so we watch that on big boxes. PA-CF holds the most heat of anything we print and is our pick when a box carries load. TPU is soft and belongs on a gasket, never on the box body. These heat calls are rankings across the materials we sell, not published specs. Filament brands differ widely on the same nominal material, so see the materials page for the full comparison.
Indoor bench, panel, or lab
- Plastic we pick
- PETG
- Heat, ranked
- Lower
- What to watch
- Our default. Tough, and it shrugs off water and shop chemicals.
Indoor, low cost, no heat
- Plastic we pick
- PLA
- Heat, ranked
- Lowest
- What to watch
- Clean detail, low price. It softens in a hot room or a sunny window.
Outdoors, sun and rain
- Plastic we pick
- PETG in black
- Heat, ranked
- Lower
- What to watch
- Sun is the enemy, not water. Black holds its color the longest.
Warm spot, near a motor or heater
- Plastic we pick
- ABS
- Heat, ranked
- High
- What to watch
- Best heat pick. Wide flat walls can lift at the corners.
Hot spot, or a box under load
- Plastic we pick
- PA-CF
- Heat, ranked
- Highest
- What to watch
- Takes the most heat we print. Costs more per part.
Gasket or bumper on the lid
- Plastic we pick
- TPU
- Heat, ranked
- Varies by product
- What to watch
- Soft and springy. Use it on a seal, never on the box body.
| Where the box lives | Plastic we pick | Heat, ranked | What to watch |
|---|---|---|---|
| Indoor bench, panel, or lab | PETG | Lower | Our default. Tough, and it shrugs off water and shop chemicals. |
| Indoor, low cost, no heat | PLA | Lowest | Clean detail, low price. It softens in a hot room or a sunny window. |
| Outdoors, sun and rain | PETG in black | Lower | Sun is the enemy, not water. Black holds its color the longest. |
| Warm spot, near a motor or heater | ABS | High | Best heat pick. Wide flat walls can lift at the corners. |
| Hot spot, or a box under load | PA-CF | Highest | Takes the most heat we print. Costs more per part. |
| Gasket or bumper on the lid | TPU | Varies by product | Soft and springy. Use it on a seal, never on the box body. |
PLA, PETG, PETG-CF and OPM get an instant price the moment you upload. ABS, PA-CF, and TPU route to a person, who prices the job. A person reviews your request and follows up by email.Full specs sit on the materials page.
Do printed enclosures work outdoors?
Yes, with the right plastic. PETG and ABS hold up in sun and rain far better than PLA. PLA turns brittle outside. Black holds its color longest, since the pigment blocks some of the sun.
Sun does more damage than water. Pick the plastic first, then the color. For a box that lives outdoors all year, we start with black PETG and go up to 3 mm walls.
We do not rate boxes to an IP number or a UL listing. If your job needs a rated box, say so up front and we will tell you plainly what we can and cannot do.
What an enclosure order looks like
These examples show typical jobs, not named customers.
A sensor team orders 25 PETG housings for a field trial. The lid takes four brass inserts. They test one box, then release the rest of the run.
A control panel shop reorders the same box twice a year. The file sits in their account, so each reorder takes three clicks.
You see one price per part. That per-part price drops as you order more, because copies share a print plate. Your instant price holds for 30 days, so a PO has time to clear. A reviewed ABS, PA-CF, or TPU quote shows its own valid-until date. There is no tooling bill and no minimum order. See how our pricing works or upload a file at the instant quote for a real number.
Most orders ship in 3 to 5 business days. We print and ship in the USA, so customs never holds your parts.
When a printed box is the wrong call
Printing is not the answer every time. A box longer than 256 mm on a side does not fit our printers in one piece. We can split it. Ask first and we will tell you how.
Very high counts change the math too. Past a few thousand of the same box a year, a mold can cost less per part. Printing still wins while the design can change. Compare total cost, not the per-part number. Our low-volume production page walks through that trade.
Need mounts and holders to go with the box? See 3D printed brackets and mounts. Need a part the maker no longer sells? See replacement parts.
Common questions
- Are 3D printed enclosures strong enough for real products?
- Yes. PETG and ABS boxes hold up to daily use. Strength comes from the design as much as the plastic. Keep walls at 2 mm or more, round the inside corners, and add a rib across any long flat wall. Pick PA-CF when the box carries real load.
- Which material is best for an electronics enclosure?
- PETG is the best default. It is tough, it shrugs off moisture and shop chemicals, and it holds its shape well in normal heat. Pick ABS when the box sits near real heat, since ABS ranks just behind PA-CF for heat. Pick PA-CF when the box must be stiff and strong.
- How thick should the walls of a 3D printed enclosure be?
- Start at 2 mm. Go to 3 mm on a large box or a lid that opens every day. Our upload check flags walls under about 1.6 mm, because thin walls crack at the corners and flex when a screw is tightened.
- How do you add screw threads to a printed enclosure?
- Two ways. You can cut threads into the plastic, or press a brass heat-set insert into the wall. Brass takes many more screw cycles, so use an insert on a lid that opens often. Tell us the screw and insert you plan to use and we size the hole to fit.
- How much clearance does a 3D printed lid need?
- About 0.2 mm to 0.3 mm on each side. A lid drawn at the same size as the box will bind. FDM holds about plus or minus 0.5 percent, so order one test part before a run when the fit is tight.
- Can a 3D printed enclosure go outdoors?
- Yes, if you pick the right plastic. PETG and ABS hold up in sun and rain. PLA turns brittle outdoors and should stay inside. Black lasts longest in the sun. We do not rate boxes to an IP number or a UL listing.
- Can I order just one enclosure?
- Yes. There is no minimum order. Order one box to check the fit, then order the run from the same file. The per-part price drops as you order more, because copies share a print plate and the file check and packing happen once per order.
- How fast will my enclosures ship?
- Most orders ship in 3 to 5 business days. PLA, PETG, PETG-CF and OPM boxes get an instant price the moment you upload. ABS, PA-CF, and TPU route to a person. A person reviews your request and follows up by email.
See your price in the next 60 seconds.
Upload your STL. Made in the USA, shipped in days.